Exploring iMovie's editing options<article>
<section class="page">
<p>
In the past two lessons, I showed you how to
piece together a basic iMovie project as well as how to
create an iMovie trailer. Helpful as those lessons were, much of iMovie 10’s editing power is hidden. Now it’s time to unearth those features. We’ll start with making more-exacting edits.
</p>
<h2>The clip trimmer</h2>
<p>
As you’ve learned, within the timeline you can drag the bottom corners of a clip’s edge to shorten or lengthen the clip (assuming, in the latter case, that you’re not already working with the entire original clip). This is a perfectly reasonable way to trim clips, but in a way you’re working in the dark: You can’t see what precedes or follows the edges of the clip. This is where the clip trimmer comes in.
</p>
<p>
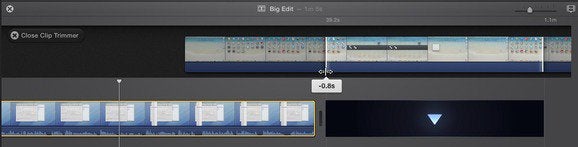
Double-click the clip, and the clip trimmer opens above the timeline. The portion of the clip that’s currently active is bright and shiny. Any material that occurs before or after the active clip bears a gray sheen. To move either the beginning or ending edit point, click and drag the white line that denotes the clip’s edge. Drag the line toward the center of the clip, and the clip shortens. Drag it away from the center, and the clip lengthens. In the viewer pane above, you’ll see the beginning of the active portion of the clip.
</p>
<figure class="large ">
<figcaption>
<p>
Adjust the beginning and end of a clip with the clip trimmer.
</p><p class="jumpTag"><a href="/article/2079349/exploring-imovies-editing-options.html#jump">To read this article in full or to leave a comment, please click here[/url]</p></section></article>
Source:
Exploring iMovie's editing options
